Wednesday 22 December 2010

How to make a Firewood Cutting Frame

The finished log cutting frame loaded with 1 meter logs that have
just been cut at 50cm. The 50cm cutting position is on the
opposite side of the frame where the chainsaw can fit easily
between the supporting legs to give the maximum width of cut.  
When I moved to this part of rural France I found that almost everyone used wood as a source of heat during the winter months. Firewood is almost always cut into 1 meter lengths for stacking and drying before being cut into shorter lengths that can fit into a woodburning stove or cooker. The most common method of cutting up these 1 meter pieces is on a saw bench, which is a fairly quick and efficient method. Personally I have an deep instinctive fear of repeatedly having my fingers so close to an unguarded circular saw.

The alternative is to use a sawing horse and cut the wood with a chainsaw. I very quickly found this method slow and inefficient and infact on ocassions dangerous for cutting smaller round logs which can get hooked on the saw teeth of the chainsaw and spin as if they were on a lathe.

You find that you are endlessly putting logs on and off the saw horse, sometimes even resorting to secure the log with your foot to maintain it's position - some years ago I saw a Frenchman doing this very thing whilst wearing slippers!!! Each time you need to put on another log to be cut you have to put the chainsaw down on the ground. I found that all you end up with is a small pile of logs and backache.

The cost effective alternative to the above methods is to use a firewood cutting frame or rack to pack all the logs into, then to cut through all of the logs held within the frame with a chainsaw. It takes me around 5-10 minutes to fill the frame, packing the logs in tightly, in as good a fit as possible. 30 to 60 seconds to cut through the logs depending on how many cuts are to be made and another 5-10 minutes to remove the cut wood from the frame and throw it either into the log shed or the back of the van for delivery. It generally takes me about 60 to 75 minutes to process 2 cubic meters of wood if it is cut to 50cm lengths and about 90 minutes as 33cm.

For myself, I find this to be a much safer, faster and more efficient way to produce firewood than using a sawbench or sawhorse. Of couse it will never beat a firewood processing machine, but unless you are a large scale firewood producer the huge expenditure on these machines cannot be justified.

The logs are packed as solidly as possible into the frame which
minimises the settlement and log movement during cutting. Any
small diameter round logs are best NOT placed on the top of the
 stack because the teeth of the chainsaw can snag them and
make them spin dangerously. 
The dimensions that I have given below will make a firewood cutting frame that will contain 0.5 of a cubic meter of wood. The 1 meter pieces that it contains can be cut into three to yield logs that are 33cm long or into two to give 50cm logs. Of course logs of any length can be produced by changing the distances between the legs and cross members when constructing the frame. I have positioned the legs in such a way as to enable the chainsaw to fit fully between them to enable the maximum possible cutting width with my saws 50cm guide bar. You can of course make a frame to cut a smaller volume by reducing the height of the support legs. I, myself am quite tall and have a lot of chainsaw experience and therefore feel confidant holding the saw at around head height to start the cutting at the top of the frame. A shorter person might find it safer and more comfortable to have the wood stacked to a lower height.

Cutting frames like this but made of steel are available I have seen a tiny one in a DIY store in Limoges for 80 euros, it has the capacity for maybe 6 or 7 logs at a time. I also have a deep mistrust of using a chainsaw in close proximity to metal. From time to time the unexpected can occur and I would rather end up catching the structure of a saw frame made of wood rather than one of steel. A wooden frame is easy to patch up if a mistake is made, I have one that has cut well over 1000 cubic meters of firewood and it's still going strong, although it has had 2 major patch ups so far.

Materials list

For the 6 vertical parts of the frame I have used 9.90 meters of 63mm x 75mm
For the bracing cross members and support rails I have used 9.92 meters of 40mm x 60mm
approx 48  70mm wood screws
approx 20  120mm wood screws
Cordless drill with correct screwdriver bits
6mm spurpoint or twist drill bits for predrilling screw holes
Handsaw
Set square
Pencil
Permanent marker pen
Disc sander for rounding off the carrying handles (optional)

Preparation

Cut 6 pieces of 63mm x 75mm into lengths of 1650mm - these will be the 6 vertical legs
Cut 2 pieces of 40mm x 60mm into lengths of  830mm - for the two lower leg bracing rails
Cut 2 pieces of 40mm x 60mm into lengths of 1430mm - for the two upper bracing rails that support the cutting bed.
Cut 6 pieces of 40mm x 60mm into lengths of 600mm - for the cross members for the cutting bed
Cut 4 pieces of 40mm x 60mm into lengths of 450mm - for additional wood supports for the cutting bed

Construction
The 3 legs for one side of the cutting frame already
marked for the position of the two rails. One at
7cm and the other at 380mm. The rails sit above
the marks.
Mark a pencil line on each one of the narrower edges of all 6 legs at 70mm from the end and then a second line at 380mm from the same end, these mark the lower positions for the two horizontal rails.
On a flat surface, position 3 of the legs parallel to each other, place the shorter (830mm) rail above the pencil mark made at 70mm. Screw the two outer legs flush with the end of this rail and position the middle leg at 390mm from the left side and drive at least 2 screws into each point where the pieces overlap each other.

The two rails attached to make up one side of the frame. The top rail sticks out to form carrying handles to enable the frame to be moved around more easily.


The two halves laid out on the floor an exact mirror
 image of each other.

Next position the cutting bed support rail (length 1430mm) just above the pencil line made at 380mm, position the rail centrally so that 300mm sticks out from each side of the outer legs on each side- these will be the carrying handles for the cutting frame to make it easier to move around. When you are happy with the position screw them into place. Remember that the rails will run on the inside of the frame. You have now made one side of the cutting frame, now you have to make the other. It is important to remember that this needs to be an exact mirror image of the first side!


One side of the cutting frame with the first four
bracing pieces attached to join the two halves together
The next stage is to lean one side of the frame on something secure and with the rails on the inside attach four of the 600mm bracing pieces with 70mm screws as shown in the photo to the right and then move the other half of the frame into position and drive in two 70mm screws where each bracing piece attaches to each leg. It helps to have someone to help hold the frame sections in place, but I managed without. The frame is now stable and it is just a matter of attaching the final two 600mm bracing pieces and the four, 450mm log supports that stop the cut logs from falling through the frame when they are cut. Each of the 450mm log supports is fixed to the support rail underneath with a 120mm screw, for added security I have also placed a screw vertically down through all of the bracing pieces into their respective supporting rails.

Note -All of the short pieces are predrilled to prevent the wood from splitting when the screws are driven through them.

To make it a little kinder on the hands I rounded off the square edges of the carrying handles with a disc sander and I find them much improved and it is well worth the less than 5 minutes that it takes ( this was done after these photos were taken). Finally I marked the cutting positions with a permanent marker.                                            
The two halves of the frame joined together.

The finished frame with all the bracing pieces and log supports fitted. After the photo was taken I rounded off the carrying handles with a disc grinder.
Including my planning and preparation time it took well under 3 hours to make. If I was to make another the same I expect that I could shave easily another hour off that. The cost of the wood at a small, local French builders merchant was 30 euro's. I probably could have got it for less if I had gone to a bigger mechant further away but would have easily lost any price advantage with the added fuel costs.                             

Tips for cutting your firewood

When loading the frame it is important to make sure that the individual pieces fit together in the best possible way. It is preferable to make sure that the frame is packed as solidly as possible. If it is not well packed then the logs will change position greatly when the log lengths are cut and makes it more likely for them to fall out of the cutting frame. Make sure that all the smaller diameter round logs are placed in the lower part of the frame where they will be held solidly. If they are placed loose on the top of the loaded frame then the chainsaw teeth can catch them and make them spin dangerously. I always put larger, heavier logs on the top of the frame and also any larger pieces that are of an awkward shape and do not fit well into the frame. It is not normally neccesary to secure the logs with a ratchet strap if you follow my advice, but the use of one does slightly decrease the movement within the frame when the logs are cut and give a little more security to the cutter.

Safety

Chainsaws are potentially very dangerous tools and it is advisable that anyone who operates one has had some training and is both competant and confident in their use.

You must also wear eye and ear protection and steel toe cap boots are recommened.

The chainsaw should have a guide bar long that is long enough to reach across the entire width of the cutting frame to minimise the risk of kickback.

The guide bar should be in good condition and not worn otherwise the saw will not cut stright. The saw chain must be correctly sharpened. If the chainsaw is running correctly and the saw teeth are sharp the saw will cut through the wood using only the force of it's own weight - you will not have to hardly use any downward force at all to cut through the wood.

Happy sawing - Michael
Sunday 5 December 2010

Woodland Tree Guide 1 BEECH

In an effort to add a little bit more diversity (and volume) to my blog I thought that I would include a guide to woodland trees. I do not however intend to include every bit of minute information about each species -this is available widely elsewhere, I will therefore (as usual) be expressing my own opinion as to the merits and bad points of each tree species. I intend to alternate these posts with my output of more general tree information. I have drawn up an initial list of around 60 species to cover, so not knowing quite where to start and not wanting to do it alphabetically I thought that I would start with one of my favourites.

Beech  fagus sylvatica
The beautiful smooth silvery trunks of two Beech trees just
down the road from where I live.

Found almost everywhere in western Europe, many of you will already know that these trees are a wonderful combination of grace, beauty, adaptability and usefulness.

If you are looking to plant Beech as a potential timber tree you have several choices as to where to get your planting stock, firstly if you have trees of good form in your locality you can usually quite easily find some self sown seedlings. If these are dug up carefully during the dormant season and placed in a plastic bag for storage and ease of transport, so that the delicate roots cannot dry out.If they are then planted out fairly quickly (within a few days) you can sucessfully move young trees that are up to about 1.3 meters in height. These will have reduced growth for a year or so after planting but will then grow away nicely.

If fact 7 years ago, I found a young Beech tree of 2.4 meters in height that had been ripped from the ground by a large forestry machine, luckily the weather was mild and damp so my young son and I carried it to one of my fields and planted it close to the boundary.It has not only survived without any dieback but has since thrived and become a fine specimen.

Largest Beech Specimens

To the best of my knowledge the tallest European Beech tree, stands at 45.4 meters in the Sonian Forest, Hoeilaart, Belgium. The tallest in the UK is in Lydney Park, Gloucestershire and is a very respectable 43 meters. The tree with the greatest girth (the trunk circumference, usually measured at 1.5 meters above ground) is a tree at Plas Newydd, Llanfairpwll, Anglesey, Wales and was 9.62 meters in circumference when measured in 2006

Planting
In the nursery trade Beech is thought of as being difficult to transplant but as you can see by my example above that it can do well bare rooted, even at quite large sizes if the conditions are right-This fundamental rule goes for all bare rooted trees, DON'T LET THE ROOTS DRY OUT! Once they dry their ability to survive the shock of transplanting is greatly reduced, and the longer they are allowed to dry the lower your survival and initial growth rate will be. Root drying is most severe on windy Spring days and I would recommend that for best survival and growth that broadleaved trees are planted out in Autumn when the soil is still warm. The tree can produce new roots before the onset of winter and be in a much better state of establishment than one planted in the Spring.

Another choice would be to grow trees from your own collected seed, collected from good quality local trees this sounds easy but do not underate just how difficult a task this can be. Most of you however will choose this last option of buying your nursery stock from a tree nursery. The best Beech forest in Europe is the Sonian Forest, Belgium which is just to the south east side of Brussels. Nursery trees grown from seed collected from here are with good reason highly sought after. However almost any Beech seed collected from a registered European seed stand will perform well.
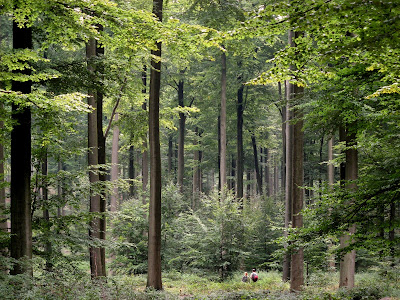
The magnificent Beech trees of the Sonian Forest also known as the Foret De Soignes,
Belgium, note the people at the bottom of the photo for scale.  The forest covers an area
 of 4421 hectares (10920 acres) at the start of the 19th centuary it covered more than
twice this area Photo by Donar Reiskoffer

Beech is useful as it is very shade tolerant, you can underplant it beneath trees that cast only a moderate shade such as Silver Birch or even Oak, I have found that the young trees are not attractive to Roe deer which can cause a lot of damage to young trees of many species such as Ash, Wild Cherry, Willow and Douglas Fir.

Soils
Beech grows well on deep well drained loamy soils that are either acid, neutral or alkaline. I have seen it growing very well in limestone areas and I find that it also performs very well on the sandy acid soils that we have here, particularly on the lower hill slopes where the soil is deeper. It does not like poorly drained soils and periods of waterlogging can be lethal especially to small trees. It should also not be planted on very shallow soils that are prone to drying out. Beech is shallow rooted and particularly prone to drought stress.

Growth
This is more of a steady tree with reasonable growth sustained over a long period than than a quick starter. For the first year or two after planting provided your methods of weed control are adequate it will probably grow  perhaps between 15 and 40cm/year depending on the size and quality of the planting stock (generally speaking smaller plants survive and grow away better than larger ones)
A young Beech tree 4 years after planting as a 1.2
meter sapling dug up from the surrounding woods.

Once the trees are established and begining to assert some dominance over the competing ground vegetation the growth rate will speed up to around 40-60cm per year. Beech does not make a good pioneer species of open ground and tends to grow better with some side shelter in the form of what are known as a nurse trees, such as Norway Spruce, Scots or Corsican Pine, European Larch, Lawsons Cypress or Western Red Cedar. The use of these conifers will greatly improve the microclimate of the new woodland for the young Beech trees and they will grow substantially faster due to the presence of the conifers. This has been proven in many trials.

As the plantation grows and the conifers start to compete with the Beech they must be removed if your aim is to have a pure Beech woodland. I myself prefer a more mixed and diverse forest composition.

The best broadleaved trees to use as a nurse tree for Beech is Wild Cherry or Silver Birch, these mature at a relatively early age compared to Beech and also only cast light shade. You must be careful especially with the Birch because of it's fast growth rate, that it does not dominate the young plantation. Plantations of pure Beech should be planted at relatively close spacings, certainly under 2 meters apart to ensure plenty of choice of final crop trees of good form and to provide the mutual shelter and competition that they need to grow well in their establishment phase.

Frost
One other consideration is that when they are in leaf, Beech trees are very frost tender, so a late spring frost can severly damage or even kill small to medium sized trees. I have seen well established trees that are 20-30 years old in Cumbria (NW England) killed by a severe late frost in mid may. Therefore Beech trees are best not planted in frost hollows or areas that are prone to late spring frosts. If a mature tree is badly frosted after it has come out into leaf it can reduce that years wood increment by as much as 90%.

Despite this tenderness to late spring frost they can be a remarkably hardy tree and can be seen growing together with Sycamore in many woods and shelterbelts high on the windswept hills and moors of  North Yorkshire (UK) where I spent my youth.

Pests and diseases
In this area, Beech grows really well and is not subject to any damaging pest and disease problems, however in many areas it can be very prone to damage by grey squirrels which gnaw away patches of bark on the trunks and branches of younger trees from about 15-40 years of age. This can be a very serious and damaging problem that can usually only be resolved by trapping. Beyond this age range they are usually less prone to damage.

The one serious disease that Beech can suffer from is Beech Bark Disease where an infected tree shows dark, weeping tarry spots. This is associated with dense infestations by the felted beech coccus which is a minute sap sucking insect. This combined attack can badly damage or kill trees usually between 20 and 60 years old. Trees that are stressed by drought or by poor site selection are more likely to be affected. Conversly Beech trees that grow in a mixed species woodlands are less likely to be seriously affected Click on the link to find out more. http://en.wikipedia.org/wiki/Beech_bark_disease

Beechwoods


A huge Beech tree at the estate Den Bramel, Bronkhorst, Netherlands. Its girth is 7.4 meters, unfortunatly this tree died in the summer of 2009 due to fungal attack. 
Photo by Tim B. Monumental Trees

Beech woods are very charcteristic by their long silvery trunks and carpets of russet leaves with a mostly bare woodland floor beneath with very little or no ground flora. Beech trees cast such a deep shade that very little can grow beneath them, this makes them a dominant species that are capable of growing through other trees such as Oak, Sweet Chestnut and Silver Birch, outperforming and eventually shading them out. This heavy shade makes walking through Beechwoods a wonderful experience for us, but not so great for wildlife which thrive when rich ground flora and a shrub layer is present. Holly and Yew are the only species that I have seen growing as a sub species in Beech woodland, but I expect that Box would also grow too.
The amazing Beechwoods of the Forets de Soignes, Belgium
in Autumn. Photo by kind permission of Philou Philou

Fruiting
Beech belongs to a valuable group of trees that produce an edible nut. These are an especially important food reserve for birds and rodents. We too can also eat them although they do contain tannins which carry a slight toxicity if eaten in large quantities. It is possible to press an oil from Beech nuts and they can also be ground into a flour which can only be used after the tannins have been leached out by soaking.

Beech trees only start to flower and produce nuts when they are at least 30 years old and possibly as late as 80. Trees must first build up their carbohydrate reserves in the previous year in order to produce the flowers that may result in a successful seed crop. It is usual for all the trees in a large geographical area to all crop in the same year. The heaviest crops, known as mast years, only occur after hot, sunny summers and almost never in successive years. If the summer is too cold and cloudy, many if not all of the nuts will be empty, the further north that you are in Europe the frequency of good seed production years decreases.


Timber
Most people of my generation and earlier sat at school desks made from Beech wood. Chosen for this purpose due to it's excellent finishing qualities, hardness and resistance to compression and splitting. It is great wood for gluing, staining and varnishing. It is excellent for flooring manufacture and furniture, in fact almost any woodwork that isn't either structural or outdoors as it has no rot resistance. It is excellent for firewood and wood pulp but straight pieces are potentially much too good to be used in this way.

Hedging


The Meikleour Beech Hedge in Perthshire, Scotland is the worlds
tallest hedge. Image courtesy of Tour Scotland Photographs.
Beech is one of the very best hedging plants, beautiful at all times of the year, it adds a classic elagance to any garden. Beech hedges have a special feature called marcescence which means that the dead leaves are retained by the trees until the Spring when the new leaves emerge, so the hedge is never bare. The worlds tallest hedge as listed by the Guinness Book of World Records is the Meikleour Beech Hedge situated 18km north of Perth in Scotland, it was planted in 1745, stands 30 meters tall and runs for 530 meters. More information at http://www.perthshirebigtreecountry.co.uk/index.asp?pg=31
For myself this is one of my favourite trees and I plant them in preference to any other hardwoods. I find them such a good all rounder with good steady growth, being fairly easy to manage, a beautiful looking tree with good Autumn colouring together with the potential to grow wood of great quality, versitility and value. How can you resist?

A Beech seedling in it's first few weeks of life, full of future promise.
Photo by Thue.

Thursday 2 December 2010

My Favourite Tree

Here is a short piece before my next in depth post comes out in a few days.

A short while ago I joined the Small Woodland Owners Group (SWOG). They produce a monthly newsletter which includes a feature called My Favourite Tree. As I have many favourite trees and having just been out with my camera I decided to send in a photo of one of them with a few words attached thinking that there would be no possibilty of it making the December newsletter. This morning, much to my surprise I found out that it had been included.

SWOG is a great little organisation full of useful information for the small woodland owner. Lots of useful advice and the membership is free. You can have a look at the newsletter following this link http://www.swog.org.uk/wp-content/uploads/2010/12/NL-Dec2010-final.pdf You can also follow the following link to access the general SWOG website and forum http://www.swog.org.uk/

The photo capture below has lost some of it's original quality and can always be seen in it's full glory in the newsletter. The original photo, along with many others can be seen in my picassa web albums which can be accessed from the link on the top right hand corner of this blog.

Wednesday 17 November 2010

Sweet Chestnut Coppice


Before I moved here to the Limousin, I had never really seen a Sweet Chestnut tree, in the far northern part of the Yorkshire Dales which used to be my home you just didn't see them. I new of only one tree on a nearby country estate which had only ever fruited once in the glorious summer of 1976. So seeing them here in their glorious profusion, reliably fruiting every year, for me really highlights the climatic benefits of living here in S.W. France compared to 700 miles further North.

In my locality it is like a weed, springing up everywhere, you cut it down and back it comes - twice as fast as before you cut it and that of course is one of the great qualities of this tree.
Looking at it's success today you would think that it's always been here - a native tree to this part of Western Europe but it's not. This came as something of a surprise to me and I thought that I new about trees! Infact it comes from Turkey and was planted thoughout Europe by the Romans who enjoyed the chestnuts and appreciated the versitility of this tree.

A recently cut Sweet Chestnut stool showing
vigourous and prolific regrowth of up to
 2 meters in length at the end of it's first
season of regrowth
For myself, this ability that Sweet Chestnut has to reliablily keep regrowing each time it is cut down is sheer brilliance. Although it is widely known that many other tree species can be coppiced, few do so here with quite the same vigour and youthful enthusiasm of the sweet chestnut. I have honestly had regrowth exceeding 3 meters in the first summer after cutting, in a woodland situation this same regrowth is already starting to close up it's developing canopy after only 3 years. Compare this to a newly planted woodland, which could take perhaps 8-12 years to reach the same stage- depending on species and planting distance.
The length of each coppice cycle varies depending on what is the desired end product. Very generally speaking an established coppice is cut over on cycles of between 10 and 20 years, this will yield large amounts of wood for fence posts, poles for a varied range of uses, some firewood and a large quantity of brushwood which in the past would have been used for pea and bean sticks.

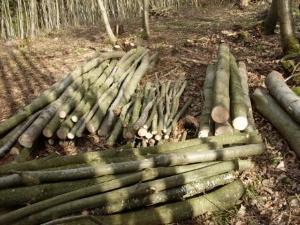
A selection of varying sized material that a short rotation
Sweet Chestnut coppice can yield.

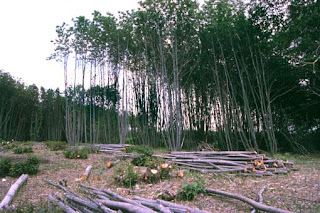
Sweet Chestnut coppice managed on a 12 year cutting cycle. A
different block is cut each year so the supply of wood is almost
never ending. Note the regrowth sprouting on the recently cut
stools in the forground.
 Until recently this sort of material wood have been regarded as "waste" and left to decompose (which in my view makes it a long term soil improver and fertiliser and a valuable wildlife habitat for birds and insects and not waste at all). These branches can also be heaped around the cut stools to protect the tender regrowth from browsing by deer, which for me is a real problem.

As commercial pressures increase, many land owners are trying to squeeze every penny from their woods. The potential now exists to make this kind of "waste" brash into wood pellets for domestic or industrial heating. Follow the link to this site www.pellet-mill.de for home production pellet mills priced from only 2200 euros and are claimed to be capable of a production of 100-250 kilos/hour. According to the manufacturers you can also use materials like leaves,grass, paper and cardboard-including the junk mail-now that has to be the best use for it yet!

For me personally, I prefer a longer rotation of 35-45 years as I am wanting good quality logs to mill into planks with the remainder for firewood. Growing a coppice on a cycle of this time span means that thinning must be done periodically to reduce the density of tree stems. Thinning involves removing the stems that are badley shaped and/or overcrowded, this is to ensure that the growth is concentrated in the better quality trunks. Failure to do this will lead excessively long whippy trees with small crowns, the overall growth and wood yield of the coppice plantation will stagnate and a low value crop will result.

This is a parcel of my neighbours Sweet Chestnut coppice, totally unmanaged since
it was last felled over half a centuary ago. All the trees have narrow crowns so growth
 and wood increment has stagnated, the stems are long and spindly and only suitable
  for firewood and wood pulp- both very low values end uses.
 Here in the Limousin, Sweet Chestnut grows very well, you should start thinning this type of long rotation coppice at around 15 years old followed by a regular thinning every 3-5 years. The first thinning is the most labourious and time consuming as you are removing 35% to 50% of the tree stems, this can seem a little dramatic when you cut it- in some dense patches you get so many logs on the woodland floor there is barely anywhere to put your feet! However after the first summer the canopy is closing up again and you are left wondering if you should have thinned it just a little bit harder!

 This first thinning yields a great quantity of branches, and small roundwood and a lot of poles, I mostly cut these into 1 meter lengths for firewood but you could split them for fencing or try making rustic furniture with them.

This predomianly Sweet Chestnut woodland was felled 17 years ago and has been
totally unmanaged since. It is certainly ready for for the poorer and more overcrowded
stems to be removed-one of my tasks for this winter!


The second and subsequent thinings are much quicker, easier and more productive as the stems are of a larger girth and you have already removed the poor quality ones. At this stage although your woodland is still technically a coppice, but to all intents and purposes like a well managed woodland.

A year ago this looked just like the previous photo. Now with all of the overcrowded
and worst shaped trunks removed it looks a lot more promising


Thinning the coppice also has other benefits, the increase in light intensity reaching the woodland floor allows a herb layer to develop which makes it more interesting to insects and birds. The chestnut trees are also becoming mature enough to yield nuts which on these relatively young trees are less prolific but of a good size. Do not however delay picking them for long as the wildlife hoovers them up and stashes them away in no time, then the leaves fall and hide any leftovers.

 As each year pases, the final felling of the coppice approaches, this final act completes the growth cycle, to delay is not wise as decay will start to invade the base of many trunks. Sweet Chestnuts also have a tendancy to twist with age, you can see the spiral patten in the bark, splitting logs like this results in near corkscrew shaped splits that are a pain to stack and cut. Also the stools become top heavy and more likely to blow over in severe storms, as many of mine did here in the hurricane force winds of December 1999.

 Once they are felled you have not only a sizable amount of wood but the joy of watching the spectacular regrowth that flourishes from each cut stool and the accompanying surge in growth of the ground flora. This coppice cycle can repeat almost endlessly with the coppice stools slowly getting larger and more powerful over the course of many hundreds of years.


An example of very overmature coppiced Sweet
Chestnut. These have such a large canopy that they
are in danger of being blown down in high winds.
It is a dilema wether to keep them as they are for
their beauty or to fell them in stages to allow them
to successfully regenerate. 
One final thing to note that I have noticed, is when really huge Chestnut stools are felled they appear to have a greatly reduced ability to regenerate. These monsters usually have 3 or 4, sometimes 5 or more large trunks, each one perhaps between 30cm and 60cm in diameter, I have found that if you cut all these off in the same year often the stool will only produce a very few shoots or none at all. These isolated shoots are very vulnerable to deer damage and to being split off by gusts of wind, if this happens a huge coppice stool that may have had a lifespan of over four hundred years is lost and belive me it's a sad realisation when you realise that you have needlessly caused this because you were ignorant of the correct cutting techniques for these special ancient trees.

 By a process of trial and error I have found that if you cut down around half of the trunks one year, the stools regenerate really well,it is better to cut all the adjacent stems on one half of the stool. New vigorous regrowth will emerge from around the base of the cut trunks, you then let this grow for 2 or 3 years by which time it will probably be 2 to 3 meters in height. Only once this new growth is well established can you finally take down the remaining large trunks on the other side of the stool.

Here is an example of an ancient overmature Sweet Chestnut coppice stool, Last
winter I have removed the trunks positioned on the front side-which is the side that
is exposed to most light. New shoots have emerged from below where the trunks
were felled. As you can see the regrowth is not as prolific or vigorous as the photo
at the begining of this blogpost. I will leave it at least another year to fell the
remaining trunks. You can see a patch of decay on the trunk on the left, a strong
 indication that parts of this stool are close to collapse.


By keeping some of the original trunks it keeps the sap being pulled up through the stool and maintains the ability of the new growth to resprout on the cut side. I suspect that as the stool ages it is less able to respond succesfully to the sudden shock that a felling of all the trunks must inflict upon it. So these really old trees need a more thoughtful approach to regenerate them, the problem is that if they are not cut, they blow over really easily, often lifting the entire root system out of the ground. Once this happens they are lost forever because the agricultural system that created them has long since dissappeared.


Sunday 24 October 2010

Considerations when planting a new woodland

As the former owner of a forest tree nursery I have been asked this many times, there are no definitive answers to this question, the best guide that you have got is to look around your local area and see which species of trees are growing well and/or make up the most of the local woodland. This way you do not have to worry about your soil type or climate -nature has aready shown you what will do well.


natural regeneration of sweet chestnut less than 20 years after this pasture was abandoned. I thinned this area a year ago and removed about half of the less vigorous and poorly formed trees


Also you should have a clear goal in mind, are you planting for wildlife and conservation, or future firewood or timber production. Your main objective could be to screen yourself off from a neighbour or an ugly development, or it could be a combination of all these factors or many others.


Many people say plant willows, everyone knows that they grow quickly, but really what is the point unless you are a basket weaver or your land is a bog (you have very few other choices in this case), they are of generally speaking little timber, firewood or long term screening value.


I would imagine that cutting a large area of willow manually as a short rotation coppice for firewood could be mindnumbingly boring. (I find cutting hazel stools bad enough-they are a lot of work for not much wood). An endless supply of small round logs that are difficult to stack and burn away quickly on the fire. Volume production isn't everything when considering what species to plant. I am sure that these are great for totally mechanised woodchip production for biomass.


Poplars are also often advised, these are certainly quick with 2-3 meters per year possible with some of the newer clones. They have little firewood value but do have a timber value if they are grown and managed in the right way. I must say that a poplar plantation is about as interesting as the highly disliked conifer monocultures but without the winter shelter.


Another suggestion made by people who are just looking quick wood is the Foxglove tree (paulownia tormentosa) which can be grown to sawlog size in Europe in as little as 8 -15 years. This is a native of China and although its a rapidly growing tree it can also be very invasive. Recent advances in breeding have lead to clones being introduced that can resist temperatures of -15 celsius possibly even -20 celsius. As a wood it is lightweight being around half the weight of oak. It is also noted as being highly fire retardant, so perhaps best avoided as firewood! As a tree it is promoted as not subject to pest problems in Europe, there is a good reason for this-none of our native insect species can feed on it. Pollinating insects however do well as it produces very showy white/pink or purple flowers depending on the species.


After well over 30 years of looking at woodlands I have come to the conclusion that the best form of woodland establishment is to mimic the way that woodland normally colonises new ground. For example in my area any previously cultivated land that for whatever reason becomes abandoned is rapidly covered by blackberry, broom, silver birch, willow,aspen,alder and hazel.

Ok, you would be mad to want to plant blackberry and broom but it is easy to see that the birch and the others are colonising species (oak can also colonise grassland too if the conditions are right).


Oak natural regeneration at 5 years from germination. I'll keep the neighbouring broom bushes under control so that the oak is not crowded out


One the birch starts to gain a little height other tree species start to appear- oak,sweet chestnut, ash perhaps a scattered scots pine or douglas fir and finally beech. These grow better after the site conditions have been made more suitable for them by the colonising species. The colonisers are quick growing but generally short lived so that when they die they are replaced by the secondary species of tree that then go on to make the dominant trees over the longer term.


The problem is that everyone who plants trees wants it to look like a woodland as quickly as possible. It is my conclusion that you should plant a mix of colonisers planted for there quick growth and the other species that are going to make up the longer term which could at sometime in the future become a valuable asset.


7 year old self seeded scots pine growing together with sweet chestnut, beech and silver birch


This will however lead to future problems. It is likely that without management the quick growing pioneers will overtop and surpress or even kill the slower growing "crop" trees. So you need to be in there watching and managing your woodland, always keep in mind your long term goal(s) You cannot just let it do its own thing or your not going to get the result that you wanted.


Douglas fir that I planted 5 years ago inamongst my hardwoods-naturally regenerated sweet chestnut and ash and planted beech. As you can see I don't tend to plant in rows and prefer to plant in groups between the trees seedlings that arrive naturally. It gives a more natural appearance but does need managing regularly to prevent overcrowding problems.


It doesn't really matter because trees grow slowly don't they? Well they can but they don't have to. Everything that you do from even before you plant the trees influences how fast they will grow and develop. Think of your trees as you would the plants in your garden, if you neglect these and don't give them there optimum conditions they perform disappointingly. The same applies to your trees. I shall try to cover these issues in later posts.


Finally to the issue of conifers. To many people these are to be avoided like the plague but in my opinion they do have a valuable place in the woods. Firstly as an economic value, last year I felled 2 large douglas fir, 47 years old. They gave me wood to the value of over 800 euro's. Ok I had to fell the trees,extract them and get a mobile sawmill in to process them. But this is in only 47 years, if you grew an oak or beech you would usually need to double or triple that age to get something of a decent value.


At age 47 an oak can show great promise but not great financial value. I'm not saying lets plant only douglas - private forestry already does more than enough of this around here, but why not plant a handfull or a few dozen conifers inamongst your hardwoods? The birds like them for nesting and winter shelter. They are useful for screening and also add a bit of body to your young woodland during the winter months and can have a highly beneficial nursing effect on your broadleaves. Many species can be removed for Christmas trees. You can think of conifers as a temporary but beneficial addition to your woodland or leave a few for perpetuity like I do.

Wednesday 20 October 2010

The Ginkgo Trees of St Sulpice Lauriere (87)France

Pictured below are the magnificent Ginkgo trees of St. Sulpice Lauriere in their full autumn splendour photographed during the first week of November.

They were planted in 1864 during the construction of the Paris-Toulouse railway and are thought to be the finest linear planting in France.

If you would like to purchase seeds collected from these trees, prices and purchase information are to be found at the bottom of this page.


The Ginkgo or Maidenhair Tree as it is sometimes called is a remarkable tree, fossils of related species date back 270 million years. During the time of the dinosaurs it flourished across the world before undergoing a rapid decline with an eventual disappearance from North America around 7 million years ago and extinct in Europe 2.5 million years ago. Even in China where it was discovered there are no recent fossil records and until it was seen by the first westerner in 1690 was thought to be extinct. It is not even certain that wild populations of this tree still exist in china and it may owe it's survival to Buddhist monks who cultivated it in the temple gardens where specimens exist that are thought to be in excess of 4000 years old.

If you are interested in finding more indepth detail about anything and everything to do with the Ginkgo tree visit The Ginkgo Pages http://www.xs4all.nl/~kwanten/


The history of our ginkgo's in St. Sulpice Lauriere starts in 1864 when the chief railway engineer M. de Leffe invited the imperial prince of Japan to stay at his chateau near Limoges. The imperial prince brought with him 13 young ginkgo trees which M. de Leffe had planted at the newly built station at St. Sulpice Lauriere. At this time the tree was mostly unknown in the West. Of the 13 trees planted, 12 survived -9 male trees and 3 females and have flourished to become such an impressive sight today.

It is a truly remarkable tree, not only is unlike most other conifers, being deciduous and having very unique broad leaves. It bears fruit that look like apricot coloured plums that have the most powerful stench. It is also highly pollution tolerant, resistant to insect,virus,fungal and bacterial attack. When the first atomic bomb was dropped on Hiroshima on the 6th of August 1945 the only thing left alive were 6 ginkgo trees, the closest of which was only 1130 meters away from the epicentre of the explosion and they are still alive today a remarkable example of the tenacity of life.


So if you are ever passing our quiet corner of the Haute Vienne take 10 minutes to pop down to the station in St. Sulpice Lauriere and marvel at these truly amazing living fossils.


This is the plaque at the station telling the story in french of these trees. If you want to read it in better clarity have a look in my ginkgo album on picasa click on the link on the top right of this blog.

Infact the plaque below incorrectly states that there are 10 male trees and 2 females. This is wrong, this autumn there are definitely 4 female trees bearing fruit, so therefore there can only be 8 male trees.


If you would like to try to grow some of these most ancient and fascinating trees you can purchase seeds that I have collected from the trees written about in this blog post.


The seeds are priced as follows.

5 Seeds £0.99
10 Seeds £1.65
25 Seeds £2.75
50 Seeds £4.85
100 Seeds £9.00
250 Seeds £23.00
500 Seeds £44.00
1000 Seeds £80.00

You can email me to discuss and reserve your requirements. Postage costs to the UK and European Union are £1.90 extra.

The seeds require around 12 weeks of pre-treatment before they will germinate, this is not difficult to do and I include free information on how to do this with every order.

And finally pictured below, one of the male trees is particularly easy to identify!

Tuesday 19 October 2010

How to build a log skidding arch

Anyone who has viewed my log arch web album will have seen a piece of equipment almost identical to the one in the picture below. This was made in a weekend by Steve from West Virginia and his friends Ed and Mark.
If you click on the album cover below it will open out into a step by step photographic record of how they contructed this simple but highly effective log skidding arch.
This was of course the inspiration for my own. It is constucted using an engine hoist as the main body, then adding a towbar, an arch structure to support the log and to add ridgidity to the frame and finally a pair of stub axles, hubs and wheels.


CLICK ON THE PHOTO TO OPEN THE CONSTRUCTION
PHOTO GALLERY
 For my own arch I purchased a 2 ton engine hoist from Carrefour (France) for 189 euro's delivered, 52 euro's worth of 3mm box section steel and a pair of stub axles and hubs from Autow warehouse (UK) for around 60 euro's. I already had a suitable pair of wheels. So allowing for a can of spray paint and a pack of welding sticks it cost me about 310 euro's.
In addition I also bought an arc welder, mask and gloves as I had never done welding before.
So this was my project that taught me how to weld, a skill that has been really useful over the last 2 years. Once you learn a skill like this you find so many applications for it and you wonder why you didn't learn it years earlier.
It is amazing the size of log that you can haul out using a log arch, even with my tiny 12hp kubota I have pulled out 3m lengths of Douglas Fir 70cm in diameter. Although it helps if the ground is not too wet and the hills not too steep!

This log had to be pulled up a steep hill to get it home so I added a "back axle" to the log held on with a ratchet strap. It worked very well once I had worked out a technique of getting it under the log!
So thanks Steve for putting this album on the web, without it I would never have made my log arch, I would not have learnt to weld, most of my logs would still be stuck in the woods and my fledgling timber enterprise would still be just a dream.

Monday 4 October 2010

Tree species guide for firewood

Here is a guide to the firewood qualities of each type of tree that we have growing in this part of southwest France.

Sweet Chestnut.
castanea sativa

Sweet Chestnut small roundwood from the first thinning of the coppice at 17 years.
These really need 2 years to dry out properly as they are unsplit.
This species makes up about 50% of my woodland. This wood must be split to enable it to dry out. If
left unsplit it will take years to dry out even if it is covered. Straight, knot free pieces are a pleasure to split parting easily and cleanly. Old, twisted and knotty pieces can be nearly impossible and it saves a lot of time and frustation if you precut through the knots with the chainsaw. On reasonable sized knots it is best to either steer well clear of them or to go for a split that will run right through the centre of the knot splitting the base of the enclosed branch. The latter is a technique that works well for me. Usable the following winter but larger pieces are better for leaving for the one after!

Silver Birch.
betula pendula
This makes nice firewood. when dry it's light weight and burns well. It must be split within a few months of felling or it will rapidly deteriorate even if kept dry. I guess the bark must be waterproof and the humidity within the wood cannot escape so that the wood that has absolutely no natural rot resistance turns to mush leaving just the outer circle of bark. The basel 50-80cm of a birch tree of any stature is an absolute sod to split even by machine. It is so tough and stringy. Best solution is to cut into short lengths of 30-40cm for splitting. I still sometimes even for these short lengths need the help of the chainsaw to cut a full log round in half. In general the wood is a little stringy and a hand axe or small chopper is a great help for cutting through the last persistant fibres. In a sunny spot it dries very well for use the following winter.

Beech.
fagus sylvatica
A lovely firewood - one of my favourites. Once again it must be split within a few months or it will start to deteriorate becoming mottled (spalted) in appearance as it becomes invaded by fungal colonies. It has no natural resistance to rot so it must be kept dry. It splits fairly easily and cleanly except for the lowest 50-100cm of the trunk. Cut this part into short pieces for splitting. If you take the effort to follow these guidelines it is super firewood. It dries easily for use the following winter and burns well with a good sustained heat.

Ash.
fraxinus excelsior
Widely regarded as the best firewood. When freshly felled it naturally has a low moisture content and lovely white wood. It will dry well even when not split. It is a little stringy at times which can make it a little difficult to split. It is however well worth the effort. Unfortunatly it is only a minor species in this area growing mostly in the valley bottoms on the more fertile and humid soils. The few trees that I have tend to be of great form and are much too good for firewood. I normally use only the branchwood for firewood production. I plant and encourage the regeneration of ash more than any other tree. Please try to do the same if you can.

Oak
quercus robur
Great firewood but it can be quite hard work to produce. Open grown trees are very knotty and these are hard to split. This is easiest to do when the wood is still very freshly felled. Cut through the larger knots with the chainsaw and or cut into short lengths to make splitting easier. Keep the logs dry or the sapwood which is often quite a large percentage of the log will quickly rot away even on split wood. If the logs get repeatedly rained on they produce several types of fungi which are soft and slimy and not a pleasant experiance without good gloves! Small splits will dry before winter but all larger pieces need an extra year or even two to get the full potential from this hot burning, long lasting wood.

Hazel
corylus avellana
Don't overlook this as a source of firewood. The wood dries well without splitting and burns nicely. Hazel is a quick growing species that coppices readily and will provide with a good crop of round logs and kindling if cut every 12-20+ years. As this grows as a dense cluster of stems make the first cuts at about 1m above ground until all the stems are felled and cut up. Then with the chain saw horizontal, cut through the top of the stool to cut free all the 1m legths that are still attached to the it- of which there can be well over 100 individual stems. This technique taught to me by my old french neighbours greatly reduces the danger of kickback caused by the guide bar tip touching the crowded stems.

Lime
tilia platyphyllus and cordata
It's wood and it burns when it is dry is about all you can say from a firewood perspective. Don't make an effort to aquire or produce firewood from it, but if the tree has to come down use it.

Fruit tree wood
Malus and Prunus species
These burn well but are usually a pain to split especially with old knotty trees


Willows
salix species
Found growing on damp or boggy soils. We have a lot of this, I have found this to be a better than expected firewood. It dries well both split or unsplit. It burns a bit quickly and therefore I would never sell it to anyone. We burn it at home as well as all the other odd left over pieces of wood, the horrid knotty bits, partly rotted logs etc. and find that they all burn and heat the house pretty well.

Wild Cherry
prunus avium
One of my favourite trees so I never cut them down unless they are almost dead or they blow over. The wood burns well but should be split first for drying. Any good straight stems should be planked and used for something better than burning!

Sycamore and Norway maple
acer pseudoplatanus and acer platanoides
Easy to split and burn pretty well. They are both only very minor species in this area so I don't get to cut a lot of either.

Conifers
abies, larix,picea, pinus,pseudosuga etc. species
I have used many species of conifers for firewood and have found that they burn fairly well, but quickly. They have a more open wood structure and therefore dry more quickly than hardwoods. For splitting I always cut them into short pieces about 30-45cm in length and always split around the knots.

Wednesday 29 September 2010

Firewood


If you start to manage a woodland it almost certainly means that some of the trees will have to be felled. It makes sense to remove the trees that are poorly shaped or overcrowded to give more space to the trees that are of better form and have the potential to grow into quality timber. Therefore you need to do something with the wood from the trees that have been felled and firewood is an obvious solution.

I always fell the trees after the leaves have fallen during the winter months. This way it causes less disturbance to the wildlife especially nesting birds. It is also too hot here during the summer months for chainsaw work. I find that even in winter within a few minutes of starting to cut I am down to my T-shirt. So I stop felling in early April and then spend 3-4 weeks bringing all the wood that has by now been cut into 1 meter lengths out of the forest and to a clear open area where the logs will later be split and stacked. It is essential that this is a sunny spot where the breeze can blow through to dry the wood. If the split wood is not stacked in the sun their is no chance that it will be dry enough for it to be burnt the following winter.

For the last 10 or so years I have split all my wood by hand using a combination of steel wedges and a 2.5kg log splitting axe. I could generally split about 1 cubic meter of wood per hour this way. If it was knotty oak it wood take a little longer or if it was nice straight sweet chestnut it could be done in as little as half an hour. I found that a session of up to 2 hours was about right for me and I split about 130 cubic meters in total during April and May of each year. Splitting this volume of wood by hand however did lead to the development of very painfull tendonitis in both elbows and forearms. It had got to the point where I had to mechanise the wood splitting or cease production.

Not having much cash for investment I looked around for something a little different to the usual log splitting equipment. On Ebay I found a rotary wood splitter called The Stickler (www.the stickler.com)which is bolted by means of an adaptor plate onto the back hub of almost any rear wheel drive vehicle. It costs around $279 and $130 delivery to France, although this was discounted by $50 as they were offering free delivery in the U.S. at the time.


The Stickler in action using my battered 1993 Toyota Hiace as the muscle power


With this extremly efficiant tool I was able to split over 200 cubic meters of wood over the course of 4 weeks working 3-4 hours per day. The cost of this was around 60 litres of red diesel but I saved myself a great deal of fatigue and physical damage. With the help of a second person the wood could have been split much quicker. I lost a lot of time getting the logs to the splitter and then stacking the splits. The finishes log piles are then immediatly covered with plastic sheeting to keep the rain out. This way with our usual hot summer the wood is ready to start being delivered during August to my loyal group of customers.


Part of a finished wood pile, this one represents about a quarter of the total firewood split for this year